Want to create a photo album on Facebook? This guide will show you how to do it.
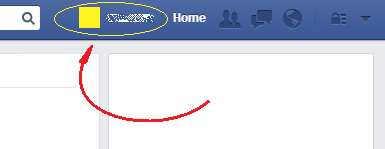
Once you have logged in to Facebook, on the top center of the page, click on your name or small profile picture.

Then, on the top right hand side of your main timeline, click on the “Photo / Video” label and select “Create Photo Album” in the appearing options.

After doing that, select the photos that you want to upload, and once you have selected them, click on the “Open” button. Remember that to select multiple photos you have to hold the 'Ctrl' key of your keyboard pressed while clicking on those photos.
After doing that, you will see a new screen. In that screen, click on the big text that says “Album Title” and replace it by the name that you will give to your album.

Also in the same screen, you have the option to set other parameters. For example, you can write a description for the album by replacing the text that says “Say something about this album” or you can set the album’s date by clicking on the “Add Date” link in order to select a value.
Once you have set those optional parameters, click on the “Post Photos” button that is near the bottom right hand corner of that screen. This way the task will be finished.
 Want to create a photo album on Facebook? This guide will show you how to do it.