Want to deactivate your account on Facebook? This guide will show you how to do it.
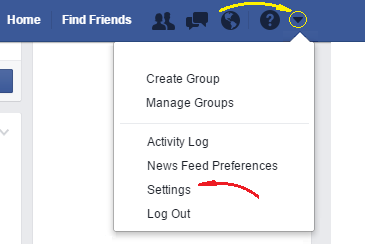
Once you have logged in to Facebook, click on the small triangle at the top right hand corner of the page and then select the option that says “Settings.”

Once you have done that, in the left hand menu, click on the Security option, which is the one indicated in the next image:

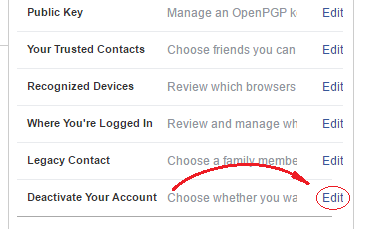
Then, near the bottom of the screen, at the right hand extreme of the “Deactivate your account” line, click on the link that says: “Edit”

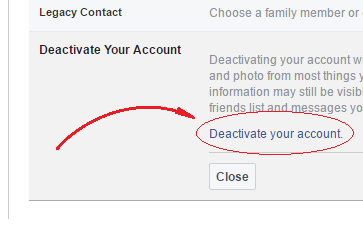
And then click on the “Deactivate your account” link that appears.

To complete the deactivation you will have to choose your reason for leaving from a list of options and then click on the Deactivate button. This will open a pop up box asking for your password: Enter it and click on the Confirm button. Finally, you will be asked to read a captcha text and enter it. Do so and click on the Submit button. This will lead you to Facebook's home page, where you will see a message confirming that your account has been deactivated.
Deactivation allows users to make their whole account invisible for temporary reasons and to recover all their information when they return, including their “list of friends” and their photos, just as it was before they left. To recover all their stuff they just have to log in again after 24 hours have passed since the deactivation, which means that you cannot deactivate your account for less than 24 hours.
 Want to deactivate your account on Facebook? This guide will show you how to do it.